When I wrote about the Agfa Isolette V recently, I shared my terrible test photos. When I shared my experience with the B-2 Speedex, I described the terrible problems the film advance had, and the Swiss cheese-like bellows. So I decided to try a mashup.
The Isolette’s Agnar lens doesn’t focus and the elements are filthy. The glass on the Speedex lens has some cleaning marks, and a tiny bit of fungus on one spot near the edge, but is otherwise quite clean. Franken-Agfa (Agfa-stein?) was soon to be born!
It was a late-night, spur-of-the-moment experiment, so I didn’t really do anything all that scientifically. I just sort of roughed it out and went for it.
The Speedex and Isolette are both folding 6×6 cameras that use 120 film, with front covers that open down. Overall, they are very similar in size and function. The Isolette, despite being a lower model overall, feels like the better-built of the two.

The B-2 Speedex was a higher-trim model than the Isolette V, though not much higher. It did feature a more versatile shutter, with speeds from 1/250 second down to 1/2 second, plus Bulb and Time (which stays open until the release lever is pressed a second time). The original Vario shutter on the Isolette V had only three speed plus Bulb, and a pseudo-Time mode achieved by a lever that holds the release lever in Bulb mode.
The Isolette’s original Agnar lens is an inexpensive three-element design, while that of the Speedex is likely an unlabeled version of Agfa’s higher-end three-element Apotar lens. Both lenses are 85mm and f/4.5, so I felt confident they would be compatible in many ways.
I started by measuring the distance from the lens board to the film plane in each camera. I opened the camera backs and stuck a small screwriver down the extended bellows to the back of the lens board, and laid another across the film plane, holding the first screwdriver as close to perpendicular to both planes as I could. I marked the distance with my thumbnail and carefully moved the screwdrivers to the other camera. An “exact” match!

Like I said, not very scientific. But I couldn’t find a caliper to do a serious measurement, and it was after midnight. Besides, I thought to myself, how much worse could it be?
I removed both lenses carefully and first attached the Speedex lens to the Isolette lens board and bellows. Then I discovered the Agnar lens wouldn’t mount on the Speedex, so I just set the leftovers aside. The aperture ring on the Agnar — the ring that actually moves the aperture blades — is external, on the back of the shutter assembly. A small post on the Speedex’s lens board interferes with it, meaning the aperture would be fixed if I attempted to form that imperfect union.
The Speedex lens didn’t mount painlessly on the Isolette, either, though it wasn’t bad. The Speedex camera has a shutter release button on the top cover that’s mechanically coupled to the lever on the shutter assembly, and the lever is designed to sit at the bottom left, as you look at the front of the camera. It would be difficult to access and activate the release in that position on the Isolette due to the Time mode switch.
So I turned the lens about 90 degrees to the right, putting both the shutter set lever and the release lever on the top corners where they can be easily accessed. This actually made the camera even easier to operate than the Isolette was originally.
Fortunately, and in spite of the fact that the Speedex lens assembly sticks out further from the front of the lens board, the Isolette still closes with the Speedex lens. It does have to be focused at or near infinity, however, or the extra 1-2 millimeters it protrudes at close focus is too much for the door.
I proceeded to shoot a test roll with some expired Kodak TMax 400 in which I carefully measured the distance from camera to subject and recorded both the aperture and the focus distance setting on the lens.

Additionally, I carefully diagrammed a long brick wall and photographed it at a somewhat shallow angle. Using the distance of the camera from the end of the wall, and the length of each brick, I can determine exactly the distance to whatever point is in focus by simply calculating the hypotenuse of the resulting right triangle. The wall conveniently has an expansion joint 14 feet from the end, which I tried to include in my shot, which provides a handy fixed distance from the end of the wall from which to calculate. I have recreated a much neater version of my diagram with Photoshop to present here.
Basically, it’s a version of a standard test for front- or back-focus problems. Except I don’t have all the fancy equipment necessary, and don’t really trust the Agfa to take useable images of a regular measuring tape. So I decided to use the environment.
I’m also not sure that this hybrid would ever be very good at getting exact focus with a wide-open aperture and a nearby subject. What I was going for was a usable mashup that is accurate enough to take decent pictures at middle apertures, like f/11 and f/16, of subjects in the range of ten feet to infinity.
A even easier way to check the focus would have been to lay a piece of ground glass, such as a spare focusing screen from a TLR, on the film plane and check the sharpness and depth of field at each distance setting using a focusing loupe.
Test results
I would call the test, overall, a raging success!
Here are a few close crops of the areas I measured focus to and some discussion of what happened.

A tight crop of the focus area on the brick wall shot shows a little bit of back focus — the area that’s sharp is slightly closer than what I intended.
For this test, I set the aperture to f/4.5 — wide open, and far from the sharpest option on this old lens — and the shutter speed to 1/250. I set the focus to 15 feet.
As shown in the diagram above, I positioned the camera around 6.5 feet to the side of the end of the brick wall, on a plane perpendicular to the wall. I knew, with the focus set to 15 feet, that my focus would be unlikely to fall exactly on the expansion joint, but I knew I’d be able to figure it out from whatever happened.
You can see the point I aimed my focus for — almost 16 feet from the camera, circled in blue — is not as sharp as another point to its right, circled in red. I measured the width of one brick plus one vertical mortared joint as exactly 16 inches, and confirmed by measuring multiple bricks.
The sharpest point is basically exactly 2.5 bricks closer to the end of the wall than the expansion joint, so 14 feet is 168 inches, less 40 makes 128 inches or 10.75 feet. If I plug that into the Pythagorean Theorem, it gives me an actual focus point of about 12.5 feet — close enough to be on target as far as I’m concerned!
These results are largely confirmed by the other tests I did.

The Ruffly Rose sign was 25 feet from the camera, as measured from the center of the sign, right about where the lowercase “y” is. As you can see, the sharpest point is slightly closer than that, but due to the sign being at shallow angle to the film plane, it’s probably not much closer in terms of actual inches.
For this test I set the aperture to f/16 — likely as sharp as this lens will ever be — and the shutter to 1/250, and adjusted the focus distance to the 25 foot mark. Using the Flexible Depth of Field Calculator I can see the nearest acceptable focus should be around 12 feet away from the camera. You’ll see in the full version of this image below that it does extend toward the camera a ways, as well as into the distance.

The close focus test using this Land Rover gave me an opportunity to test a shorter distance. With focus set for 6 feet, again at f/16 and 1/250, I set the camera 6 feet from the windscreen hinge.
Given those settings, the total depth of field should be less than 4 feet, with acceptable focus from about 4.8 feet to just under 8 feet from the camera. As you can see, what appears to be the very sharpest point (circled in red) appears to be ever-so-slightly closer to the camera than the hinge — just an inch or two. But acceptable focus, indeed, extends for some distance in front of, and especially behind, the hinge.
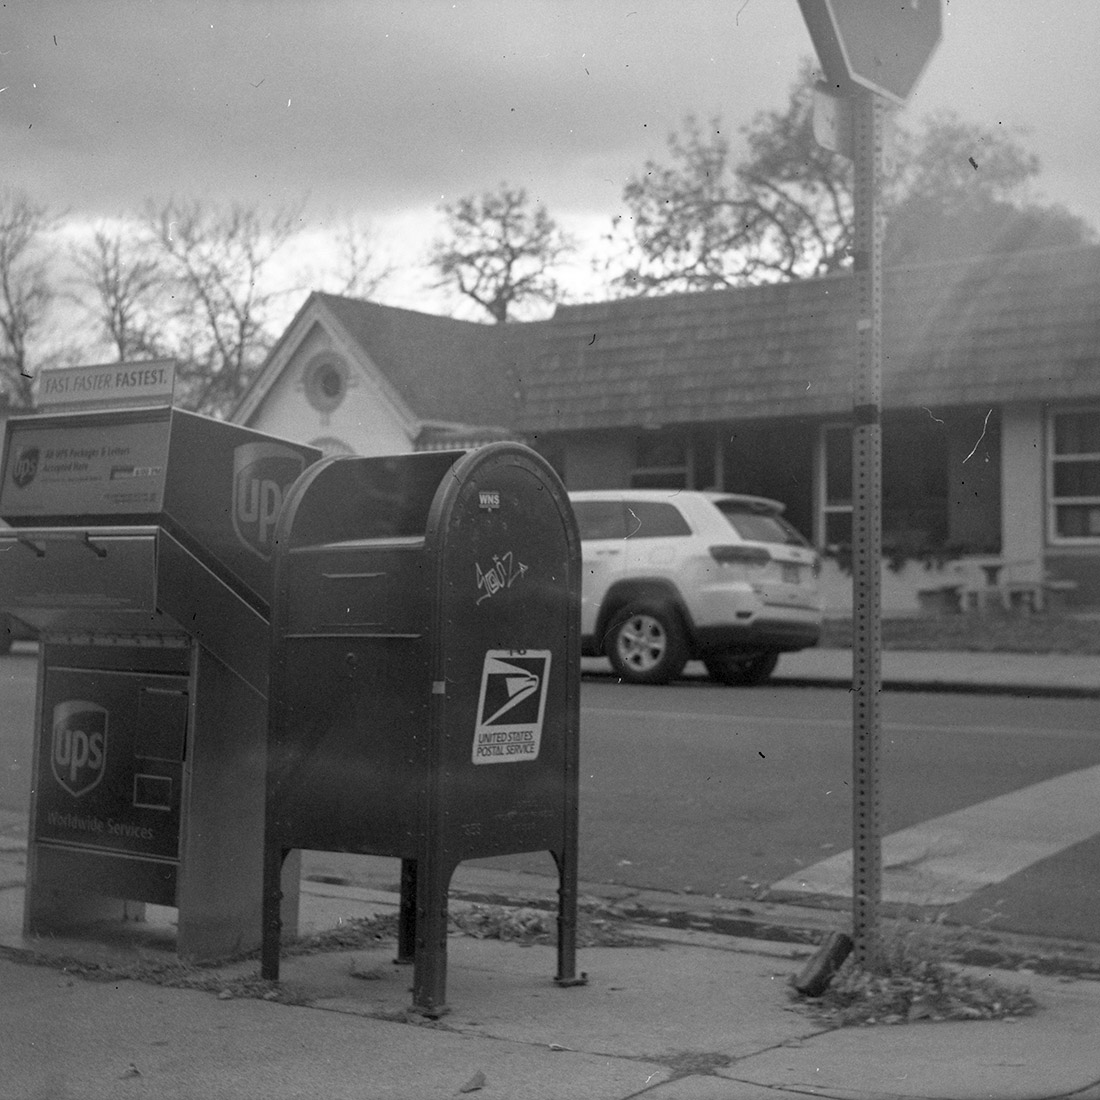
One more test I needed to perform was an assessment of infinity focus. I didn’t have anything around to do a really good test — a large monument or mountain — but I paced off the distance to a sign I figured would be large enough to determine reasonable sharpness on.

Moody clouds aren’t a great subject for testing focus, but the “Bicycles” sign had promise. I estimate the distance at about 110 feet — and I set focus to infinity.
With the aperture set for f/16 once more, and the shutter again at 1/250, my depth of field should’ve been broad enough to get anything farther than about 25 feet in acceptable focus.
The sedan parked on the right-hand edge of the frame is about 30 feet from the camera, and I’d say the sharpness is very good. The sign, the clouds, and even the trees, look good enough to me. The left-hand tree appears less sharp, I believe, because there was a stiff breeze and its unfallen leaves were fluttering quite a bit.

On the whole, I’m very pleased with the results. As you can see, there are some light leaks and some sharpness imperfections that I believe are the result of the small spot of fungus in the lens. It will probably be best to use smaller apertures when possible and focus a little further than the actual range for middle-distance subjects, and count on depth of field to produce acceptable results.
This was never going to be a fantastic camera. Even if everything about it were perfect, it still couldn’t hold a candle to my Yashica-Mat for overall quality. But for a fun camera — and one with the provenance to be worthy of some cool old film on the next Expired Film Day — this will do more than well enough.
If you’re interested in the leftovers — a B2 Speedex body with a troublesome film advance knob, and an Agfa Agnar 85mm f/4.5 lens that needs its ability to focus fixed — let me know. I’ll send them to anyone who pays shipping!
Here are the rest of my full test shots.